Moving a playset is like relocating a small wooden village that happens to be held together by a thousand screws, mysterious brackets, and hope. What seems like a “we’ll knock this out in an afternoon” job can quickly spiral into a full-blown weekend marathon with more parts than a Lego set and fewer instructions.
But don’t panic (yet). With the right tools, a solid plan, and a little patience, you can safely disassemble, transport, and reassemble your playset without turning into a backyard version of a reality show meltdown. Curious how to turn chaos into control and get your kids’ favorite structure in one piece? Keep reading—we’ve got your back.
What You Need
-
Screwdriver
For unscrewing and screwing any screws for disassembling or reassembling. Be sure to have a Phillips head and a flat head screw driver.
-
Allen Wrench Set
For screwing and unscrewing any screws that require an Allen wrench. Make sure you have both a Hex and Star key set.
-
Power Drill
For screwing and unscrewing any screws that need to be very tight.
-
Ladder
For accessing high-reach places on the playset.
-
Tape Measure
Although a tape measure isn't needed for disassembly, it may come in handy when reassmbling the playset.
-
Plastic Bags and Marker
For storing aqnd labeling screws that need to go into specific holes when reassmbling. Don't skip this!
-
Work Gloves
For avoid scrapes and splinters when handling wood and other parts of the playset's frame.
-
Moving Blankets
For wrapping any fragile parts on the playset in order to avoid scratches.
-
Ratchet Straps
For securing the load during transit.
-
Dolly
For moving and leveraging heavier items to the same you times and energy when moving.
Step-by-Step Instructions
-
1Step 1Prepare the Area
Start by removing any toys, lawn equipment, garden tools, or loose objects in and around the playset. These can become serious tripping hazards when you’re walking around with planks of wood or operating power tools. If the playset is on mulch or sand, have a tarp handy—you can lay it down to collect smaller pieces and tools so they don’t get lost in the material.
-
2Step 2Take Photos
Pull out your phone and snap plenty of photos of the fully assembled playset. This step might seem unnecessary at first, but it will be your best friend when it’s time to reassemble everything at your new location. Capture wide shots from every angle, as well as close-ups of complex joints, hardware placements, or areas where multiple parts connect—basically, anything that could leave you second-guessing later.
-
3Step 3Remove Accessories
Begin with anything that’s detachable and less structural—swings, slides, climbing ropes, monkey bars, steering wheels, telescopes, and any other fun add-ons your kids insisted on having. These parts are typically attached with bolts, screws, or chains, so grab the appropriate tools (usually a wrench or screwdriver) and take your time removing each one carefully.
-
4Step 4Label Parts
As you begin removing beams, panels, and support pieces, take the time to label each one clearly. Use masking tape along with a permanent marker to number the boards and note where they belong (e.g., “left side railing” or “roof support beam 2”).
Don’t stop with the wood. Place all screws, bolts, washers, and brackets into labelled plastic bags corresponding to the parts they came from—like “swing set bolts” or “slide screws.” Store these bags in one box or bin so you’re not hunting through a sea of random hardware later.
-
5Step 5Disassemble the Roof
Start by setting up a ladder on stable, level ground so you can safely reach the top. If the roof is made of fabric or plastic, you may be able to simply unscrew or unclip it. For wooden roofs, you’ll likely need a screwdriver or power drill to remove the panels and underlying supports. As with earlier steps, collect and label all hardware in a bag labeled “roof.”
Place roof panels flat on the ground or wrap them in a moving blanket to protect them from cracking, warping, or splintering during the move. Once the roof is safely down, the rest of the disassembly process becomes much more manageable.
-
6Step 6Disassemble the Walls
Start at the top and work your way down, removing one panel at a time using your screwdriver or power drill. Most walls are connected by bolts or screws, so having the right size wrench or socket set on hand will speed things up.
As each section comes off, label it clearly with a marker and masking tape—names like “left platform wall” or “ladder side panel” will be gold when you’re rebuilding later. Keep the hardware for each section in its own labelled plastic bag and store them together in a secure bin or box.
-
7Step 7Disassemble the Base
The base includes the main support beams, flooring panels, and posts that anchored everything above. Depending on the age and model of your playset, you may encounter a mix of bolts, screws, and possibly even nails holding everything together.
Start by removing any remaining floorboards or decking panels, then gradually detach the larger support beams. Use your wrench, screwdriver, or drill to carefully undo all fasteners. If some boards feel stuck or warped, a gentle tap with a hammer can help ease them apart—just don’t force anything and risk cracking the wood. As always, label each piece clearly and store its corresponding hardware in a labelled plastic bag.
-
8Step 8Wrap Parts
Wrap each large component—beams, panels, roof sections, and slides—in a blanket or thick padding and secure it with stretch wrap or tape (just avoid placing tape directly on painted or finished surfaces).
For extra peace of mind, wrap sharp edges or corners with foam padding or extra layers of wrap to prevent dents or scrapes. Stack wrapped pieces neatly in groups to keep everything organized and easy to load.
-
9Step 9Secure Small Parts
Use resealable plastic bags to group hardware by section—label them clearly, such as “slide bolts,” “roof brackets,” or “swing connectors.” Once labelled, place all the bags into one or two sturdy containers (like a toolbox or plastic bin) so they’re easy to find and won’t scatter during the move. It’s a good idea to tape a list of contents to the outside of the bin as a quick reference.
-
10Step 10Load onto Dolly
Carefully lift the heaviest or most awkward pieces onto a sturdy furniture dolly. Make sure the weight is balanced to prevent tipping as you move. If the piece is too long or wide, have a partner steady it while you guide the dolly.
Use moving straps or bungee cords to secure the parts onto the dolly before you start rolling. This helps prevent shifting or slipping while you maneuver through gates, down driveways, or onto a truck ramp.
-
11Step 11Load the Truck
Stack lighter and more delicate items, like slides or panels, on top or toward the sides to avoid crushing anything important. Use ratchet straps to secure each section tightly to the truck’s walls or anchor points. This prevents the load from shifting mid-transport, especially during sharp turns or sudden stops. Be mindful of how items are stacked—nothing should be able to slide, roll, or tip over. And remember to leave the essentials bin (with all your labelled hardware bags) in an easy-to-reach spot so it’s the first thing you grab when it’s time to reassemble.
-
12Step 12Transport Safely
With everything loaded and secured, it’s time to hit the road—but this isn’t a race. Transporting a disassembled playset requires smooth, steady driving to keep all those carefully wrapped and strapped pieces in place. Avoid sudden stops, sharp turns, and bumpy backroads if you can. Take corners slowly and leave plenty of space between you and the vehicle in front of you, especially when braking.
-
13Step 13Unload and Reassemble the Playset
You’ve made it to your destination, and now it’s time to bring that backyard magic back to life. Start by carefully unloading the heaviest components first—just as you packed them. Use a dolly or have a partner help with any large beams or panels to avoid injury. Lay everything out in a clear, organized space, ideally close to where the playset will be reassembled. Keep your labelled parts and hardware bags close by—you’ll need them as you go.
Begin reassembly by starting with the base and working your way up. Follow the photos you took during disassembly for guidance, and refer to your labels to match each piece to its correct place. Reattach walls, railings, and roof sections in the same order you took them down. Once all the major components are secured, reinstall the accessories like swings and slides. Take your time, double-check each connection, and tighten every bolt and screw.
In no time, your playset will be up and ready for action—just waiting for the sound of happy kids and the squeak of swing chains in the breeze.
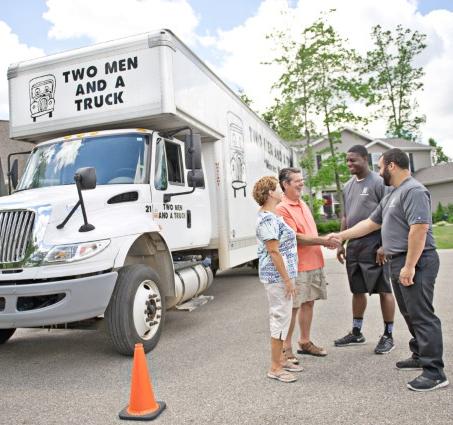
Need a Hand with the Heavy Lifting? TWO MEN AND A TRUCK® Has You Covered!
Why wrestle with wrenches and wood when you can call in the pros? At TWO MEN AND A TRUCK®, we don’t just move boxes—we move big backyard memories. Whether it’s disassembling, securely transporting, or carefully reassembling your playset, our experienced team makes it easy, safe, and stress-free.
Let us do the heavy lifting so you can focus on the fun stuff (like watching your kids race to the swings again).
Call today to schedule your worry-free playset move!
Thinking of Moving Yourself?
Think Again!
While moving yourself may seem less expensive... the costs add up.
Do-It-Yourself Moving Costs:
- Truck Rental
- Mileage
- Fuel Charge
- Additional Insurance
- Equipment Rental
(straps, rope, furniture pads, bungee cords, stretch wrap, dollies, etc.)
- Time
- Boxes & Packing Supplies
- Possible Damages
(belongings, relationships, & injuries)
- Recruiting Friends to Help
- Food & Beverages
- Chiropractor Visits
- Packing a Truck
- Learning How to Maneuver a Moving Truck
- Broken Promises
Call TWO MEN AND A TRUCK
We can move as much or as little as you need while fitting your schedule & budget!