As the 2024 Halloween countdown continues, so does TWO MEN AND A TRUCK’s 2024 “boxtume” series that provides creative and inexpensive ideas and tutorials to put together Halloween costumes.
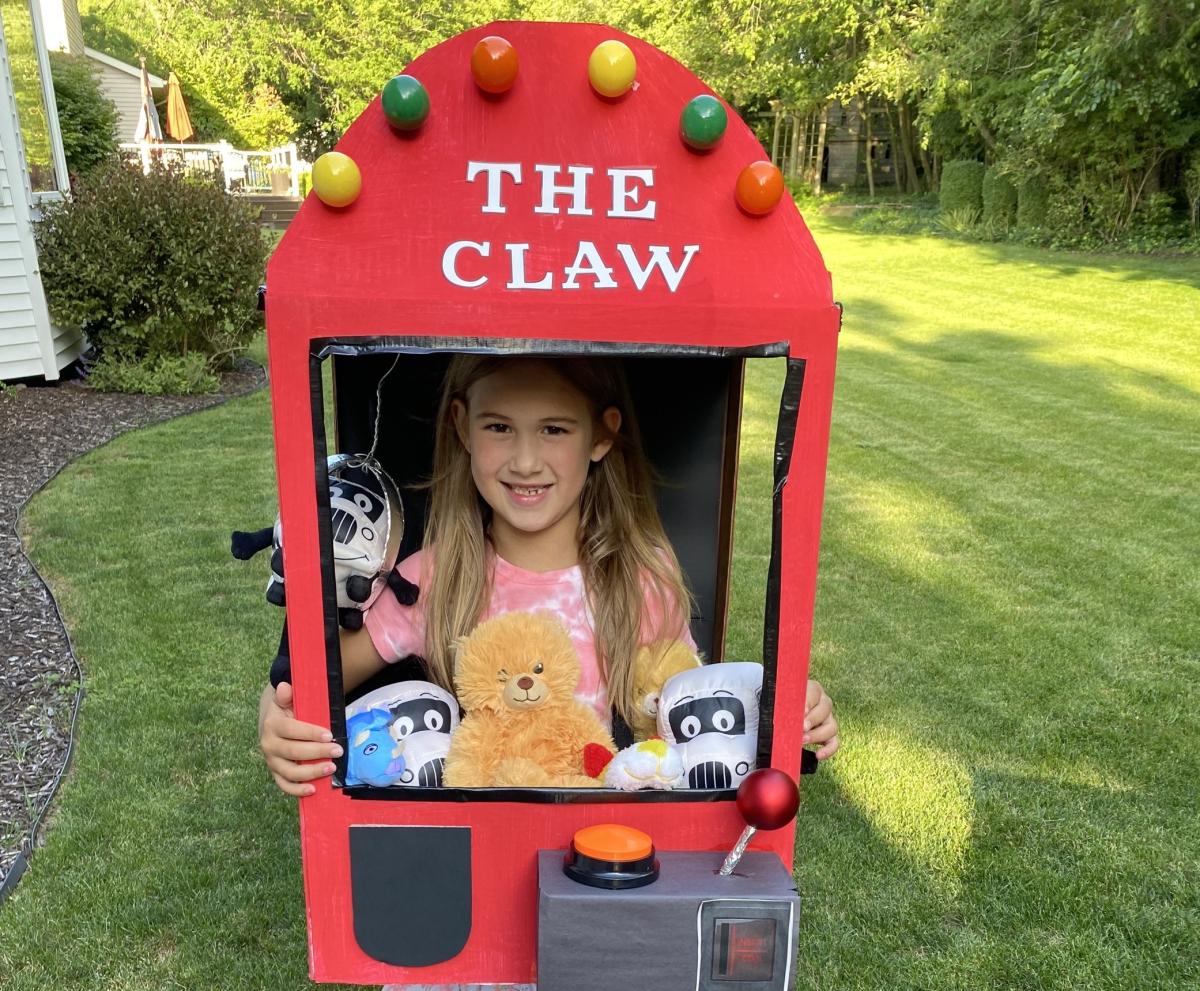
This week, we’re showcasing a fan-favorite arcade game that will grab everyone’s attention: The Claw Machine!
The life-like claw machine boxtume is not only eye-catching, but a ton of fun to use on Halloween and after, as you’re guaranteed to win big!
Directions
Step 1: Take a large box and cut off the four bottom flaps of the box. As for the top flaps on the box, you want to keep the front flap on the top, as this will be where your lights and wording go. The rest of the flaps on the top will act as your “roof” later.
Step 2: Next, cut the front and sides of the box. Start at the front; to make it easier, use a ruler and measure one and a half inches from each side to the front of the box. Once you have your measurement, cut it out. Now, on the two sides, mark out an inch and a half and cut those pieces out.
Step 3: Next, pick whatever color you would like and paint the outside of the machine.
Step 4: Once the box is dry, take black duct tape and outline the front of the box with it.
Step 5: The next step is to take a piece of black poster board and put it in the machine as the backdrop. Size it and then glue it in.
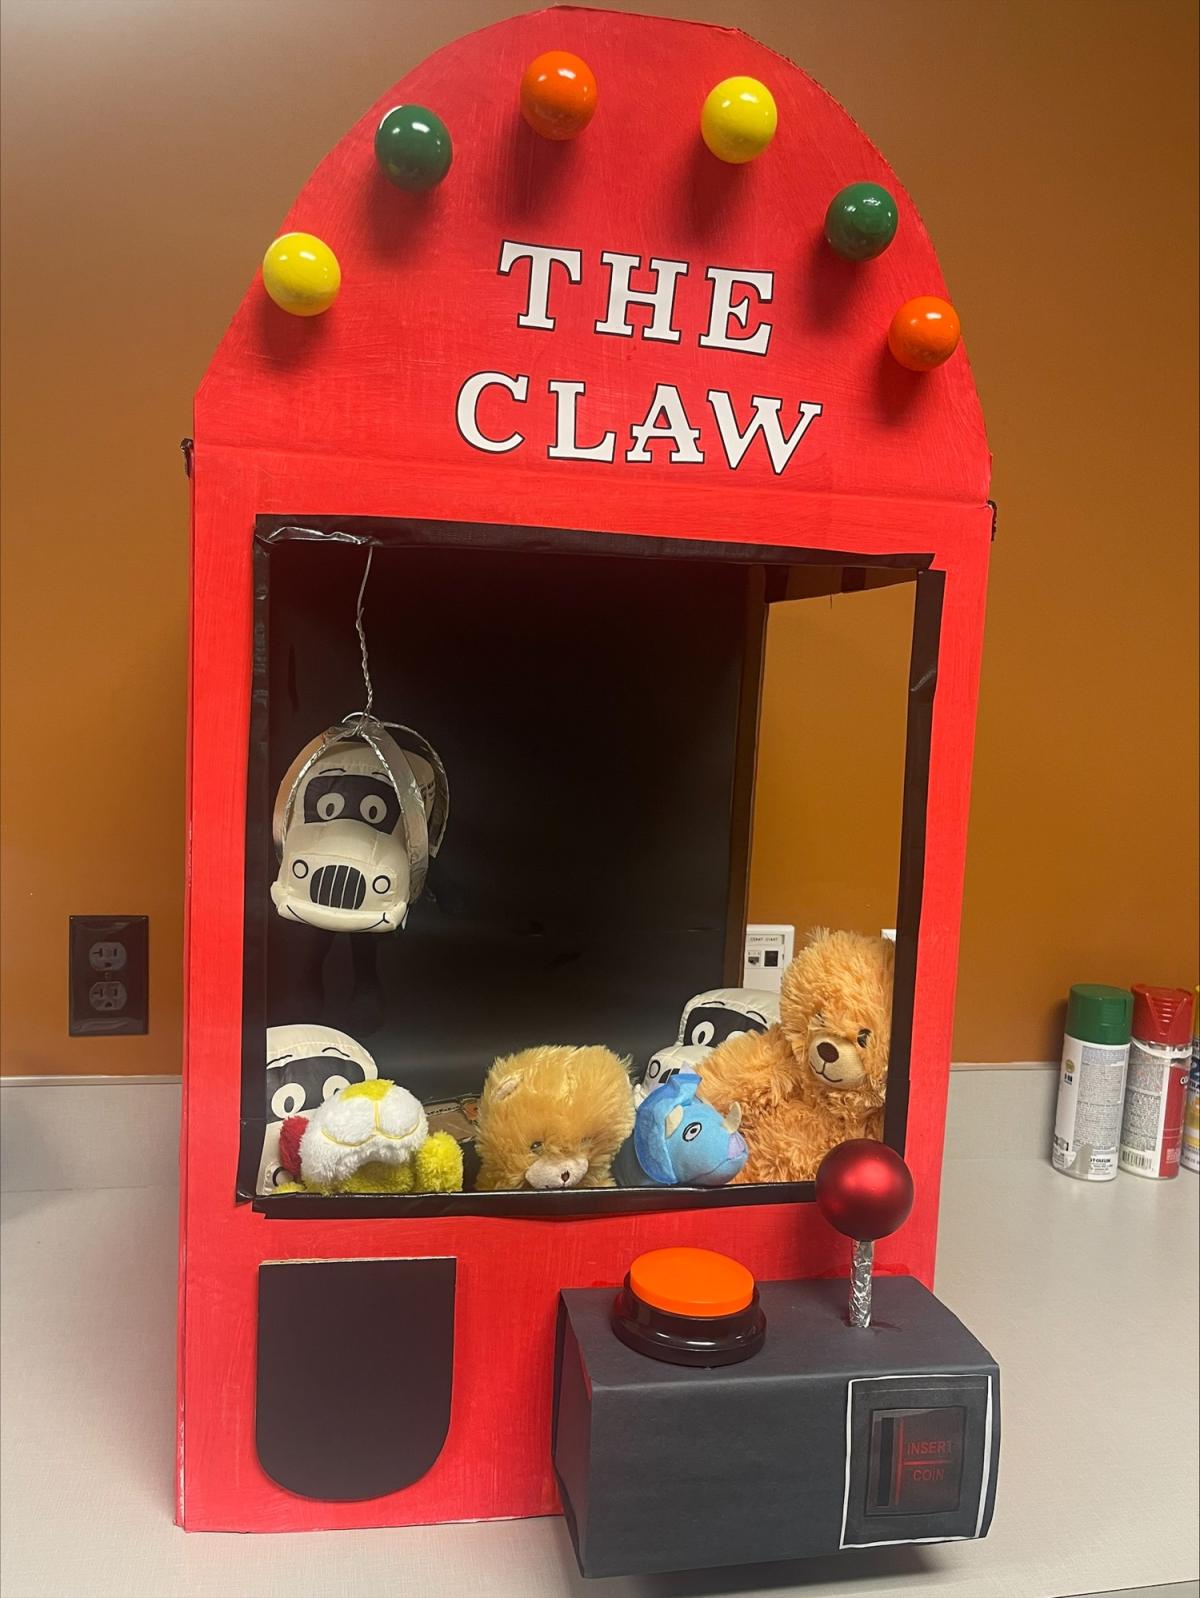
Step 6: After that, take your ping-pong balls and glue them to the top flap to create “lights” and then add some stickers for the name of your machine.
Step 7: While the box is drying, take your empty rectangular tissue box and cover it with black construction paper. From there, glue on your button, and then take a pencil, break it in half, and cover it in tinfoil. When it’s covered, take a plain red ornament and glue it to the top of the pencil. Lastly, to make the coin slot, print out an image.
Step 8: To make the “swinging door” where the prize would come out, with a piece of your scrap paper, cover it with black construction paper, and then glue it on.
Step 9: This next step is how the boxtume will stay up when your child is wearing it. Take part of a flat box and lay it on the ground, then put the machine upright and measure out one inch from all four sides. Cut it out and fold the flap, then cut out a circle in the middle of the box to go over the body of the person wearing the costume. Once you have that measured, glue it inside the box. Keep in mind it should sit at the waist of the person, so it stays upright when wearing it. It’s a good idea to factor in height so their head can be fully seen.
Step 10: Next glue the clamps of the suspenders to the cardboard base.
Step 11: Now, take two headbands, glue them together and wrap them with tinfoil. The headbands will act as your claw. Once they’re dry, take the durable wire and feed one side of the wire into the roof and the other end will attach to the hanging claw aka the headband.
Step 12: Once that is complete, you’re free to add in other stuffed animals and toys as the prize items!
Make sure to continue following our blogs all month or click here for more DIY boxtume ideas!