We’ve finally made it to Halloween week, and the time for trick-or-treating is nearly here!
If you’re a frequent reader of our blogs or you follow our social channels, then you know we’ve been dropping our 2025 Halloween Boxtume tutorials for the past few weeks. What are “boxtumes”? They’re fun, D.I.Y. costume creations people can make at home using old moving boxes and easy-to-obtain supplies to create a quick, easy costume for Halloween!
We’ve already unveiled four different costume ideas: Rock, Paper, Scissors, a Fish Tank, a DJ Table, and a Flower Pot – all which can be viewed by clicking here.
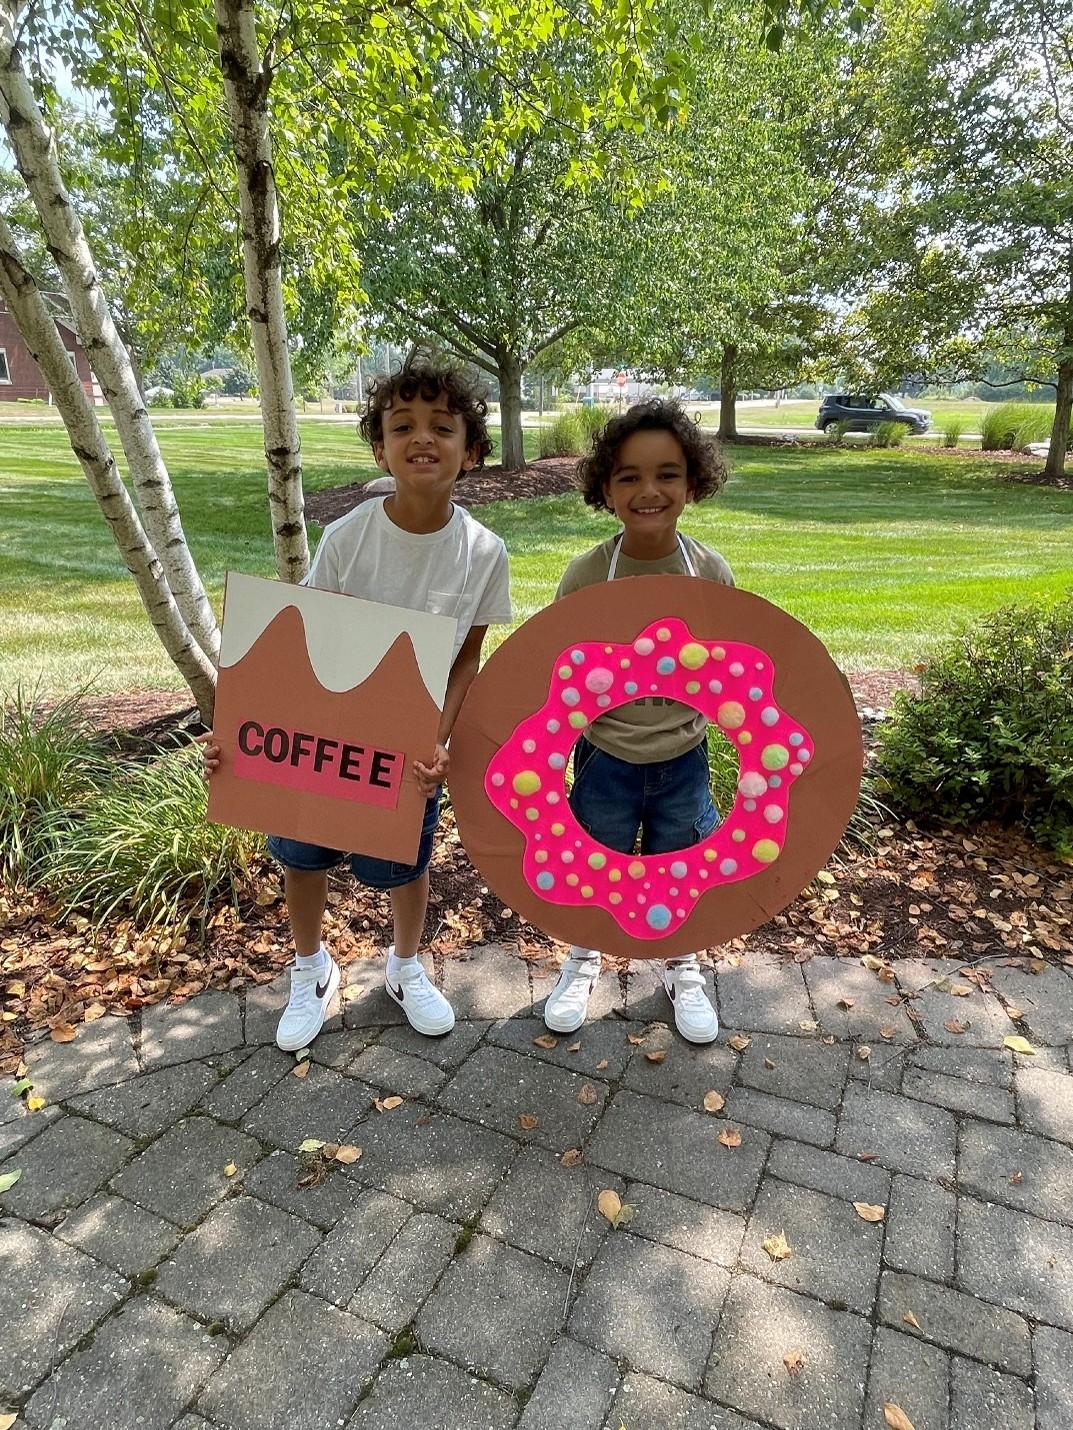
With just a few days until Halloween, we have one final boxtume to reveal – a Coffee and Donut boxtume, which can be used for a tandem costume. Follow along below to see how it’s made!
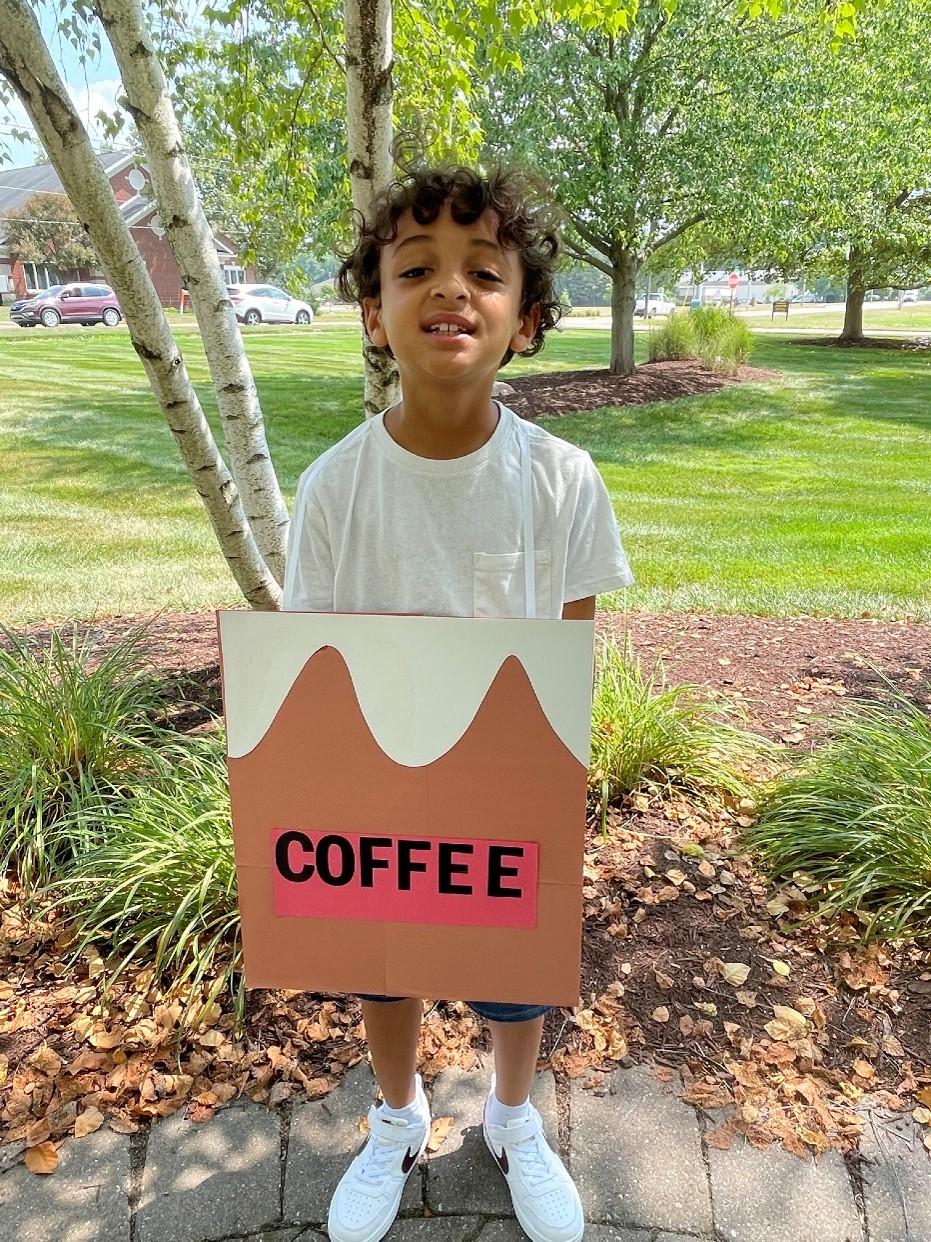
Coffee
Step 1: Take a medium-sized box and trace out a square-like shape. Depending on how tall the child is, you may want to make it longer.
Step 2: Cut out the shape and then take brown poster board and glue it down to the box you just cut out.
Step 3: While it’s drying, take a white poster board and trace out some squiggles to make it look like “coffee creamer”. After you trace the “creamer”, cut it out and glue it on top of the brown poster board, so it looks like the “cream” is falling into the “coffee”.
Step 4: Next, take construction paper and some letter stickers to write out “coffee.” You can also use a marker and write it out.
Step 5: After you’re done with that, glue it to the middle of the finished product.
Step 6: Once your coffee is dry and you’re confident it won’t “spill”, flip it over and cut out some heavy-duty string. Glue the string to each side of the top of the box to create a “necklace” like effect so the kids can wear it. Once it’s dry, it’s ready for the kids to wear!
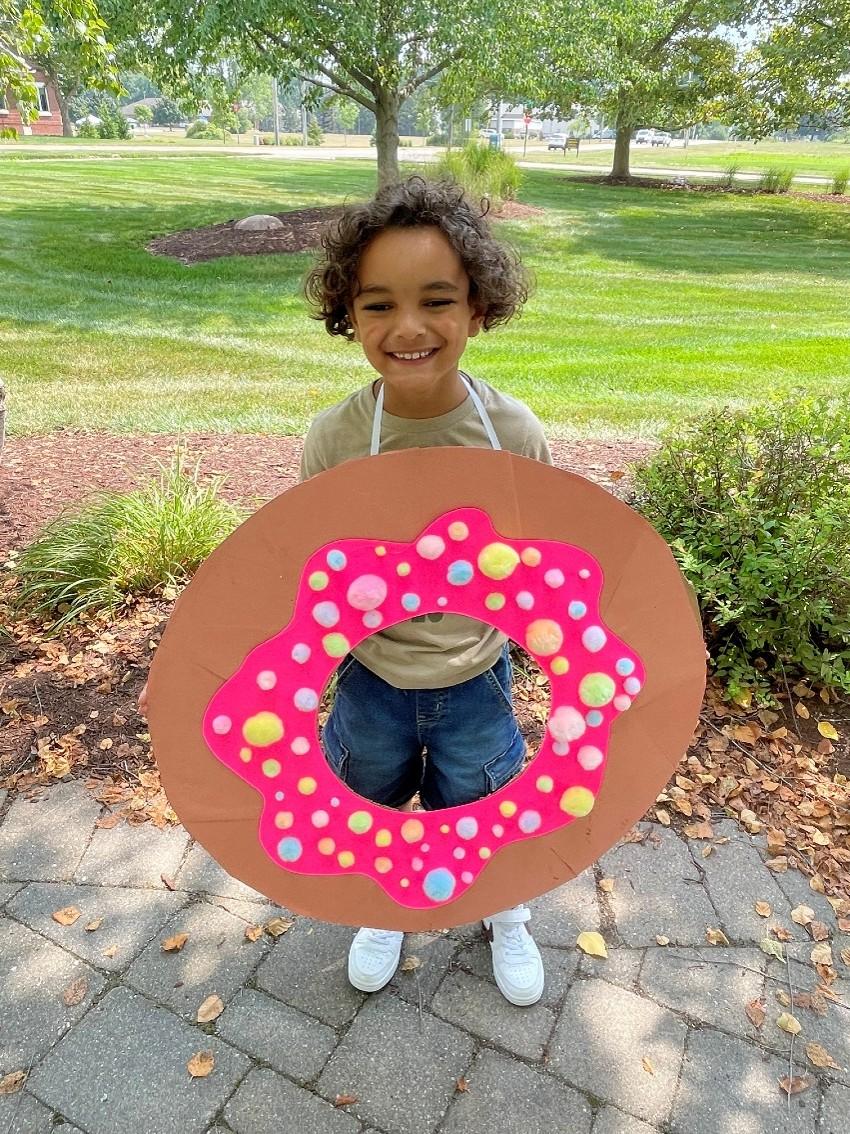
Donut
Step 1: Take a large or medium-sized box, depending on how tall your child is, and trace a large circle on the box. Once you complete that, create another circle within that large circle.
Step 2: Next is to cut out the large circle and then the circle in the middle.
Step 3: Once everything is cut out, take the brown poster board and glue it to the “donut” box.
Step 4: While the poster board and box are drying, pick out a brighter color of poster board, which will act as your “frosting” to cover the center. You can use crazy scissors to help with the squiggle shape.
Step 5: Once you have the “frosting” cut out, glue it to the donut, and then take pom poms and glue them on the poster board to help create a “sprinkle” effect look.
Step 6: Now that everything is dry, flip your donut over and cut out some heavy-duty string. Glue the string to each side of the top of the box to create a “necklace” like effect so the kids can wear it. Once it’s dry, it’s ready for the kids to wear!
To see more boxtumes from this year or year’s past, click here!